Introduction
Free Spire.Doc for .NET is a Community Edition of the Spire.Doc for .NET, which is a totally free word component for commercial and personal use.
As a free C#/VB.NET component, it also offers a lot of powerful functions. Developers can use it to generate, read, write, save, print and convert documents on any .NET applications. The featured function, conversion allows converting Word documents (Word 97-2003, Word 2007, Word 2010, word 2013) to commonly used file format, such as XML, RTF, TXT, PDF, XPS, EPUB, HTML and Image etc.
Visit Site for Details :- Click Here to Visit Official Site

In this article we are going to learn how to generate DOC file Use Powerful tool Spire.Office for .NET
- We are using Visual Studio 2012.
- Free Spire.Office Component [Free for commercial and personal use] Support .Net from [ 2.0 to 4.5 ]
Getting Started
Let’s start with creating a new project in Visual Studio 2012.
For creating new project from Visual Studio IDE first select File Menu then inside that select New and then finally select Project.


Fig 1. Add Project.

Fig 2. Naming Project.
Inside this dialog we are going choose template for doing that we going to select Templates Menu from left side of dialog just below Installed Templates after selecting Templates it will expand in that we are going to select Visual C# inside that finally we going to select Web Templates.
After choosing Web in Middle panel you will find all different Web templates available in ASP.NET. In that we are going to choose [ASP.NET Webforms Application] and .Net Framework 4.5.
At last we are going to name project as SpireComponentDemo and click on OK button.
After project creation below is view of Project which is created.

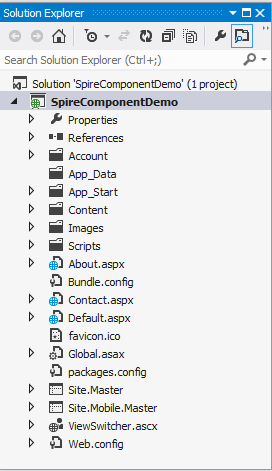
Fig 3. Project View after adding.
After creating project now let’s add Spire Component [Spire.Office for .NET]
Adding Spire Component from Package Manager Console
For adding component from Package Manager Console just type [Install-Package Spire.Office]


Fig 4.Adding Spire.office component from Package Manager Console.
Adding Spire Component from Manage NuGet package
For adding component from Manage NuGet package from Visual studio IDE select Tools then NuGet Package Manager Manage NuGet packages for solution.

Fig 5.Adding Spire.office component from Package Manager Console.
After selecting Manage NuGet packages for solution a new dialog will pop up as show below.

Fig 6.Adding Spire.office component from Manage NuGet packages.
After that in search box of Manage NuGet packages dialog enter [Spire.Office] after entering in middle panel you will see [Spire.Office for .Net] with Install button just click on Install button .


After clicking on Install button
Fig 7. While downloading Spire.office component from Manage NuGet packages.
After successfully installation


Fig 9. Referencing added after downloading Spire.office component from Manage NuGet packages.
After installing and viewing reference now let’s add a simple webpage to Project.
Adding Webpage.
For adding webpage just right click on project then select Add inside that select Add New Item after selecting a new dialog will pop up with Name [Add New Item] in that select Webform and name your Webform [demo.aspx]
Fig 10. Adding New Web form.
Fig 10. Adding New Web form.

After adding page now let’s Create, Write and Save Word in C# Using Spire.Doc Components.
Create, Write and Save Word in C# Using Spire.Doc Components
For doing this demo I am simple going to add a button on demo.aspx page

Fig 11. Adding button on demo.aspx Web form.
After adding button now let’s write code for Create a Word Document file from using Spire.Doc Components.
Adding Namespace for Using Spire.Doc Components

Fig 12. Code for accessing spire components.
Creating Document File
In below snapshot we are creating a Word document file using Spire.Doc Components for doing this
First we need to create object of Document class
Document doc = new Document();
After that we are going to add new section
[Section section = doc.AddSection();]
Because contents are written in a paragraph which is contained in section of document then we are going
Add new paragraph
[Paragraph Para = section.AddParagraph();]
After creating new paragraph we just need to add content in paragraph for this we need to use [AppendText]

After adding Text which you want now we need to save this document file to folder for doing this I have added Folder name DocumentFile in Project and using doc.SaveToFile to save to this document file to folder.


Complete Code Snippet.

Project view after creating Word Document File in Folder and Document

Fig 13. Project view after creating Word Document File in Folder.
Output

Fig 14. Output after creating Word Document file using Spire Component.
Adding Header and Footer to Word Document while creating
In this part we are going to add header and footer to document which we are creating.

Snapshot of Code for Adding Header and Footer

Output

Adding Image in Word Document
For adding Image in document file we are going to create a new Paragraph after that to add image in document file we need image that must be stored in our Project folders meanwhile I have few images stored in Images folder which I am going to use for adding in document file. Then assigning image to DocPicture Class and finally setting width and height of Image file.
Below is code snippet for adding Image


Fig 16.Output after adding Image to Word Document file.
Adding Text Watermark in Word Document
For adding Text Watermark we need to create object of TextWatermark class then we can set properties such as (Text, Font size, Font Name, Layout, Color).
In below code snippet I have created an object of document class then added Section to document and assigned section to paragraph after that adding TextWatermark class we are going to set properties of TextWatermark class.
First we are going to set Text properties the text which is set as watermark.
TextWatermark TXTWatermark = new TextWatermark();
TXTWatermark.Text = "Spire Watermark";
Setting Font Name and Font size
TXTWatermark.FontSize = 45;
TXTWatermark.FontName = "Broadway BT";
Setting Layout
TXTWatermark.Layout = WatermarkLayout.Diagonal;
Setting Color
TXTWatermark.Color = Color.Purple;
Assigning Watermark class to document.
document.Watermark = TXTWatermark;
Complete Code Snippet of Adding Text Watermark in Word Document


Visit Site for Details :- Click Here to Visit Official Site
Click here to Download Tools :- Download Here

Click here to Download Tools :- Download Here


Comments